Today we'll build a simple to-do app together. Along the way, you'll learn what Django is, how to install it, and what each part does.
You don't need to know Django. A little Python is enough. If you follow every step, you'll finish with a working app. You can add tasks, mark them as done, and delete them.
What Is Django?#
Django is a Python tool that helps you build websites fast. It's called a web framework.
A framework gives you ready-made parts for the boring work. Think of user login, forms, security, and an admin panel. Without Django, you'd write all of that yourself. With Django, it's already there.
Instagram and Pinterest have both used Django. People like it because it's quick to work with and secure by default.
How Django Organizes Code (MVT)#
Django splits your code into three parts: Model, View, and Template. This is called MVT.
Part | Job | Where it lives |
|---|---|---|
Model | Describes your data and talks to the database |
|
View | Takes a request, does the work, sends back a response |
|
Template | The HTML page the user sees |
|
Here's what happens when someone opens a page:
Browser → urls.py → view → (model → database) → template → BrowserThe browser asks for an address. Django checks urls.py to find the right view. The view gets data from the model if it needs any. Then it fills a template and sends the page back.
Learn this flow first. The rest of Django makes more sense after that.
What You Need Before Starting#
You need Python 3.12 or newer and a code editor like VS Code.
Check your Python version:
python --versionOn macOS and Linux, you may need to type python3 instead of python.
Install Django#
Install Django inside a virtual environment. A virtual environment keeps each project's packages separate, so projects don't break each other. Make one for every project.
First, create a folder and the environment:
mkdir todo-project
cd todo-project
python -m venv venv
Next, activate it.
On Windows:
venv\Scripts\activateOn macOS and Linux:
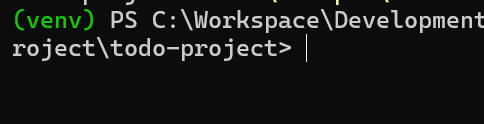
source venv/bin/activateYou'll see (venv) at the start of your terminal line. That means it worked.
Now install Django:
pip install djangoCheck that it installed:
python -m django --versionYou should see a version number like 6.0.
Create the Project#
One command creates the whole project structure:
django-admin startproject config .We named the project config. The dot at the end tells Django to use the current folder.
Your folder now looks like this:
todo-project/
├── manage.py
└── config/
    ├── __init__.py
    ├── settings.py
    ├── urls.py
    ├── asgi.py
    └── wsgi.py
You'll mostly use three of these files:
manage.pyruns commands. You use it to start the server, create apps, and update the database.settings.pyholds your project settings, like the database, installed apps, and timezone.urls.pymaps web addresses to the code that handles them.
You can ignore asgi.py and wsgi.py for now. They matter when you put the site on a real server.
Start the local server:#
python manage.py runserverOpen http://127.0.0.1:8000 in your browser. If you see Django's rocket page, it works.
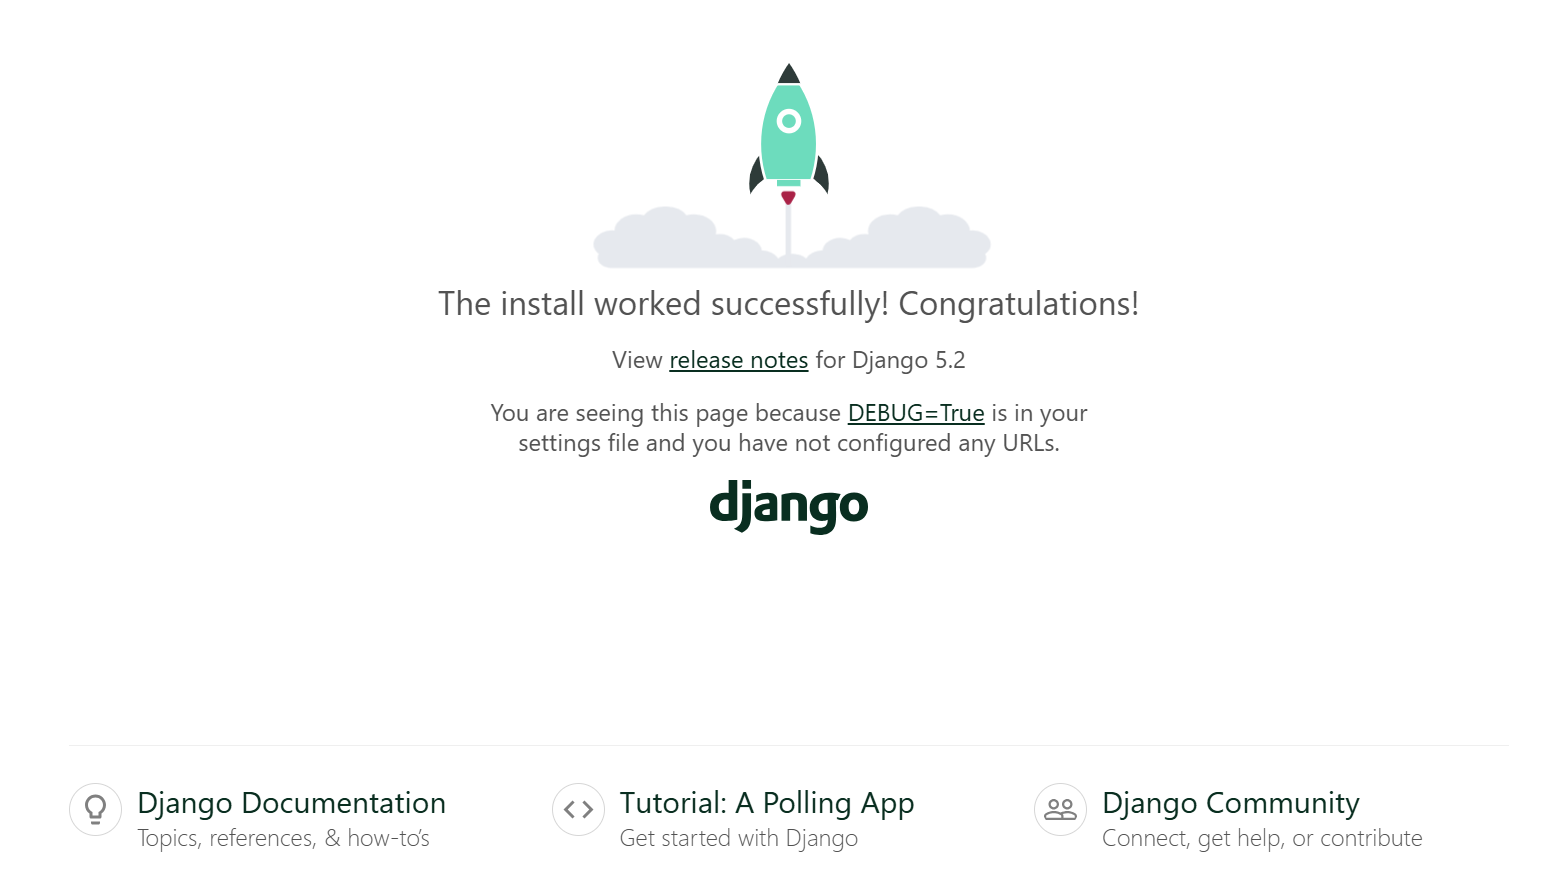
Press Ctrl + C in the terminal to stop the server.
Project vs. App#
A project is your whole website. An app is one feature inside it.
A site can have a blog app, a users app, and a payments app. Each one does a single job. In this guide, the project is config and we'll add one app called tasks.
This is the part that confuses most beginners. Just remember: one project, many apps.
Create the tasks App#
Run this command(In the same terminal where the venv is active):
python manage.py startapp tasksDjango creates a tasks folder:
tasks/
├── migrations/
├── __init__.py
├── admin.py
├── apps.py
├── models.py
├── tests.py
└── views.py
Django won't find the app on its own. You need to register it. Open config/settings.py and add "tasks" to INSTALLED_APPS:
INSTALLED_APPS = [
    "django.contrib.admin",
    "django.contrib.auth",
    "django.contrib.contenttypes",
    "django.contrib.sessions",
    "django.contrib.messages",
    "django.contrib.staticfiles",
    "tasks",  # our app
]
Step 1: The Model#
A model describes the data you want to save. Each model becomes a table in the database. Each field becomes a column.
Open tasks/models.py and write this:
from django.db import models


class Task(models.Model):
    title = models.CharField(max_length=200)
    is_done = models.BooleanField(default=False)
    created_at = models.DateTimeField(auto_now_add=True)

    class Meta:
        ordering = ["is_done", "-created_at"]

    def __str__(self):
        return self.title
Here's what each part does:
titleis short text, up to 200 characters.is_doneis either True or False. New tasks start as False.created_atsaves the creation time on its own.Metasorts tasks. Unfinished ones come first, and newer ones come before older ones.__str__sets the name Django shows for each task in the admin panel. (Next, we will get to the admin panel.)
Now we'll create the database table for your model. Django does this in two steps, called a migration. Run these two commands in order:
python manage.py makemigrations
python manage.py migrate
Here's what each command does.
makemigrations looks at your Task model and writes a small file that describes the change. In plain words, it says "create a Task table with a title, an is_done flag, and a created_at time." You'll see this output:
Migrations for 'tasks':
  tasks/migrations/0001_initial.py
    + Create model Task
Nothing has changed in the database yet. Only the instruction file exists.
migrate reads that file and updates the database. This is when the real Task table is created. You'll see a long list of lines ending in OK. Most of them are Django's built-in tables for users, sessions, and the admin panel. Your own table is the line Applying tasks.0001_initial... OK.
If makemigrations says No changes detected, the tasks app isn't in INSTALLED_APPS. Add it in settings.py and run the command again.
From now on, run both commands every time you change a model, for example when you add a new field.
Step 2: The Admin Panel#
Django gives you a free admin panel. It's a website where you can see and edit the data in your database. You only need to tell Django which models to show.
Open tasks/admin.py and write this:
from django.contrib import admin

from .models import Task


@admin.register(Task)
class TaskAdmin(admin.ModelAdmin):
    list_display = ("title", "is_done", "created_at")
    list_filter = ("is_done",)
    search_fields = ("title",)
Here's what each part does:
from django.contrib import adminloads Django's admin tools.from .models import Taskloads your model. The dot means "from this same app folder."@admin.register(Task)tells Django to show theTaskmodel in the admin panel. Without this line, your tasks stay hidden.class TaskAdmin(admin.ModelAdmin)holds the settings for how tasks look in the panel. The name is up to you, butModelNameplusAdminis the common habit.list_displaypicks the columns in the task list. Without it, you'd only see the title.list_filteradds a filter box on the right. Withis_done, you can show only finished or only unfinished tasks.search_fieldsadds a search box at the top. Here it searches inside the task titles.
Notice the comma in ("is_done",) and ("title",). In Python, a list with one item needs a trailing comma. Without it, Python doesn't see a list.
Now create an admin user. This is your login for the panel:
python manage.py createsuperuserDjango asks you three things:
Username: pick any name, like
admin.Email address: you can leave it empty and press Enter.
Password: type it twice. Nothing shows on screen while you type. That's normal.
If your password is short or simple, Django warns you. For a local test project, type y to continue.
Now start the server and open http://127.0.0.1:8000/admin/. Log in with the user you just made.
You'll see a section called Tasks.
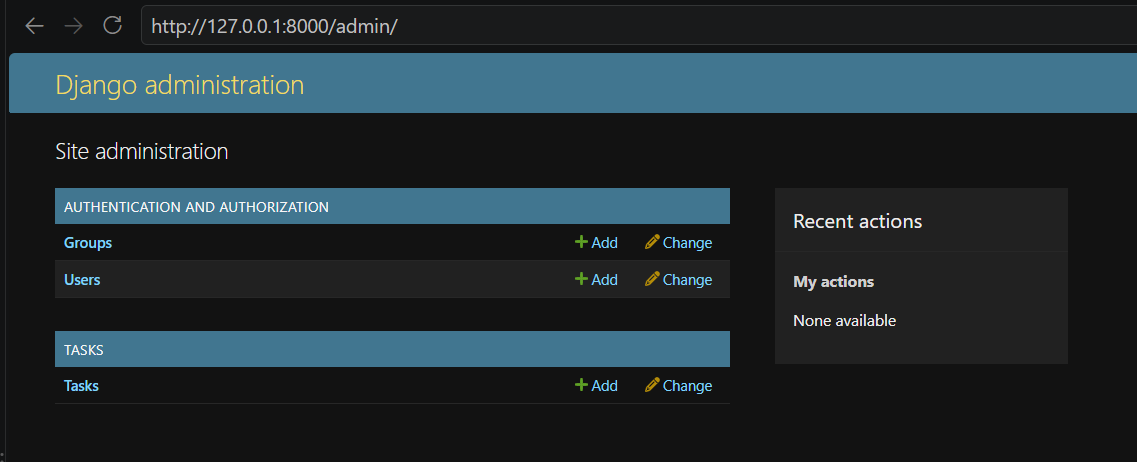
Click Add next to it, type a title, and save. Add three or four tasks. Check the box on one of them to mark it as done. Then go back to the task list and try the filter and the search box.
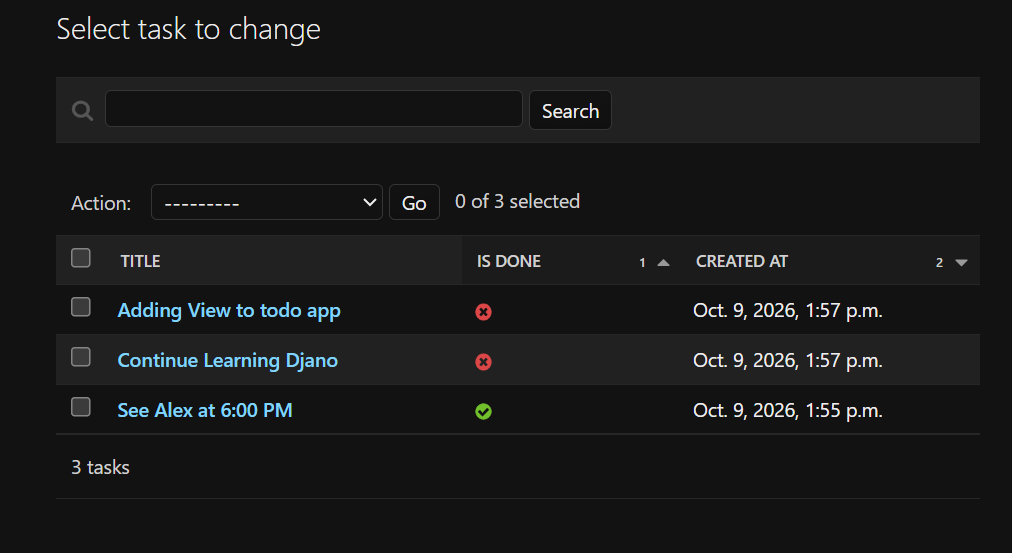
You just built a working data manager without writing any extra code.
If you see the error no such table: tasks_task, you skipped the migration step. Run makemigrations and migrate again.
Step 3: The Views#
A view is a Python function. It gets a request from the browser and sends back a response.
Think of a restaurant. The request is the customer's order. The view is the waiter who handles it. The response is the food that comes back, which here is a web page.
Our app needs four views: show the list, add a task, flip a task between done and not done, and delete a task.
Open tasks/views.py and replace everything inside with this:
from django.shortcuts import get_object_or_404, redirect, render
from django.views.decorators.http import require_POST

from .models import Task


def task_list(request):
    # Read all tasks from the database and pass them to the template
    tasks = Task.objects.all()
    return render(request, "tasks/task_list.html", {"tasks": tasks})


@require_POST
def task_add(request):
    # Get the title from the form and save it if it isn't empty
    title = request.POST.get("title", "").strip()
    if title:
        Task.objects.create(title=title)
    return redirect("task_list")


@require_POST
def task_toggle(request, pk):
    # Flip the done/not-done status
    task = get_object_or_404(Task, pk=pk)
    task.is_done = not task.is_done
    task.save()
    return redirect("task_list")


@require_POST
def task_delete(request, pk):
    # Delete the task
    task = get_object_or_404(Task, pk=pk)
    task.delete()
    return redirect("task_list")
Don't open the browser yet. These views have no addresses and no template. We add both in the next two steps.
The imports#
The first three lines load tools we need.
renderbuilds an HTML page from a template and some data.redirectsends the user to a different address.get_object_or_404finds one item in the database, or shows a "page not found" error.require_POSTis a rule we attach to a view. We'll look at it below.Taskis the model you wrote in Step 1.
View 1: show the list#
def task_list(request):
    tasks = Task.objects.all()
    return render(request, "tasks/task_list.html", {"tasks": tasks})
Every view gets request as its first argument. It holds everything about the visit, like which page was asked for and what data was sent.
Task.objects is how you talk to the database about tasks. all() means "give me every task."
The last line calls render with three things: the request, the template file name, and a dictionary. The dictionary {"tasks": tasks} hands our tasks to the template. Inside the template, you'll use the name tasks to show them.
View 2: add a task#
@require_POST
def task_add(request):
    title = request.POST.get("title", "").strip()
    if title:
        Task.objects.create(title=title)
    return redirect("task_list")
When a user submits the "add task" form, the browser sends the form data inside request.POST. The form has one input named title, so we read it with request.POST.get("title", ""). The second value, an empty string, is the fallback if title is missing.
.strip() removes spaces from both ends. Without it, a user could save a task that contains only spaces.
if title: is true only when the text isn't empty. So blank tasks never get saved.
Task.objects.create(title=title) makes a new task and saves it in the database.
At the end, redirect("task_list") sends the user back to the list page.
Notice that "task_list" is not the function name that we created in the first view. It's a URL name, a label for an address. We attach it in the next step, in the line path("", views.task_list, name="task_list"). We used the same word for both on purpose, to keep things easy to remember.
This redirect also stops duplicates. If we showed a page directly after the form, a browser refresh would send the form again and add the same task twice.
View 3: mark a task as done#
@require_POST
def task_toggle(request, pk):
    task = get_object_or_404(Task, pk=pk)
    task.is_done = not task.is_done
    task.save()
    return redirect("task_list")
This view has an extra argument called pk. It stands for "primary key," which is the unique ID number Django gives every task. Task 1 has pk=1, task 2 has pk=2, and so on. The address will carry this number, so the view knows which task to change.
get_object_or_404(Task, pk=pk) finds the task with that ID. If no such task exists, the user sees a 404 error page instead of a crash.
not task.is_done flips the value. True becomes False, and False becomes True. One view handles both "mark as done" and "undo."
task.save() writes the change to the database. Without this line, the change is lost.
View 4: delete a task#
@require_POST
def task_delete(request, pk):
    task = get_object_or_404(Task, pk=pk)
    task.delete()
    return redirect("task_list")
This works like the toggle view. It finds the task, deletes it with task.delete(), and sends the user back to the list.
What does @require_POST do?#
A browser can send two common kinds of requests. A GET request means "show me a page." A POST request means "I'm sending data, please change something."
The line @require_POST sits on top of a view and adds one rule: only POST requests are allowed. If someone types the delete address in the browser bar, that's a GET request. Django refuses it with a "405 Method Not Allowed" error.
This protects your data. A task can only be deleted through the delete button, never by opening a link.
task_list has no rule because it only shows data. Anyone can open it with a normal GET request.
Quick check#
Your views.py should have four functions: task_list, task_add, task_toggle, and task_delete. Three of them have @require_POST above them. If a name is spelled differently, the next step will fail, so check the spelling now.
Step 4: The URLs#
A view can't run until it has an address. The URLs file is the map that connects each address to a view.
Think of a building with a directory at the front door. A visitor says "I'm here for room 3," and the directory points them to the right office. Here, the address is the room number and the view is the office.
Django uses two directory files, so let's see why.
config/urls.pyis the main directory for the whole project. It already exists.tasks/urls.pyis the directory for thetasksapp only. You create this one.
The main file hands everything that belongs to the app over to the app's own file. This keeps each app tidy. When a project grows to ten apps, each app has its own map.
Create the app's URL file#
Create a new file called tasks/urls.py. Django doesn't make it for you.
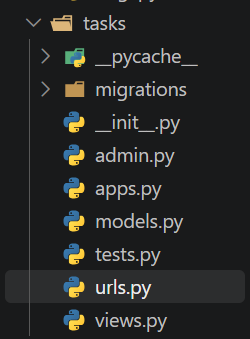
Put this inside:
from django.urls import path

from . import views

urlpatterns = [
    path("", views.task_list, name="task_list"),
    path("add/", views.task_add, name="task_add"),
    path("<int:pk>/toggle/", views.task_toggle, name="task_toggle"),
    path("<int:pk>/delete/", views.task_delete, name="task_delete"),
]
The imports#
pathis the tool that links one address to one view.from . import viewsloads yourviews.pyfile. The dot means "from this same folder." That's how we can writeviews.task_listbelow.
The list#
Django looks for a list called exactly urlpatterns. Don't rename it. Each line inside is one path(...) with three parts:
path("add/", views.task_add, name="task_add")The address pattern:
"add/". This is the text that comes after the site name. Sohttp://127.0.0.1:8000/add/matches this line.The view to run:
views.task_add. Notice there are no brackets after it. We pass the function itself. Django calls it when someone visits the address.The name:
name="task_add". This is a label for the address. We'll come back to it below.
Here is what each of our four lines means:
Address | View that runs | What it does |
|---|---|---|
|
| Shows the list page |
|
| Saves a new task |
|
| Flips a task between done and not done |
|
| Deletes a task |
The first address is an empty string. It means "nothing after the site name." That's the home page, like http://127.0.0.1:8000/.
What is <int:pk>?#
Some addresses need to say which task they mean. Task 3 and task 8 need different addresses, but we don't want to write one line per task.
The part in angle brackets is a placeholder. It has two pieces: int:pk.
intmeans "only match a whole number."pkis the name we give the number. Django passes it to the view under this name.
Look at the view you wrote in Step 3: def task_toggle(request, pk):. The pk there is the same pk from this address. Here's what happens when someone visits /3/toggle/:
The pattern
<int:pk>/toggle/matches. The number is 3.Django calls
task_toggle(request, pk=3).The view finds task number 3 and flips its status.
If someone visits /abc/toggle/, nothing matches, because abc isn't a whole number. They get a 404 page.
What is name= for?#
The name is a label for the address. Other code uses the label instead of the address text.
You already used it in Step 3. The line redirect("task_list") looks for the address labeled task_list, and sends the user there. In Step 5, the template will use the same labels in {% url 'task_add' %}.
Why not type the address directly? Because addresses change. If you later move the list page to /tasks/, you only change one line in urls.py. Every label keeps working, and nothing else needs an edit.
The label and the view function have the same name here. That's our choice, and Django doesn't require it.
Connect the app to the project#
Django doesn't read tasks/urls.py on its own. You need to point the main directory to it. Open config/urls.py and change it like this:
from django.contrib import admin
from django.urls import include, path

urlpatterns = [
    path("admin/", admin.site.urls),
    path("", include("tasks.urls")),
]
You only add two things: include in the import line, and the last path(...) line.
Here's how to read that last line: "For any address that starts with nothing, go look in tasks/urls.py."
""is the starting part of the address. We use an empty string, so the whole site belongs to our app.include("tasks.urls")means "continue the search inside the filetasks/urls.py."
The admin/ line comes first. So /admin/ goes to the admin panel, and everything else goes to the tasks app.
Follow one visit from start to end#
A user clicks the Delete button for task 5. The browser asks for /5/delete/.
Django opens
config/urls.py. It checksadmin/. No match.It checks
""withinclude. This matches, so Django openstasks/urls.py.It compares
5/delete/with each line. The pattern<int:pk>/delete/matches, withpk=5.Django runs
task_delete(request, pk=5).The view deletes task 5 and redirects to the list.
Django checks the lines from top to bottom and stops at the first match.
Quick check#
The site isn't ready yet. If you open http://127.0.0.1:8000/ now, you'll see a TemplateDoesNotExist error. That's expected. The view runs, but the page file doesn't exist. We build it in Step 5.
If you see NoReverseMatch instead, a name doesn't match. Check that your name= values are exactly task_list, task_add, task_toggle, and task_delete.
Step 5: The Template#
A template is an HTML file. It can show data from your views using Django's template tags.
Create these folders and file exactly as shown:
tasks/
└── templates/
    └── tasks/
        └── task_list.html
The folder name tasks appears twice on purpose. It stops template names from clashing when your project grows.
Put this code in task_list.html:
<!DOCTYPE html>
<html lang="en">
<head>
    <meta charset="UTF-8">
    <meta name="viewport" content="width=device-width, initial-scale=1.0">
    <title>To-Do List</title>
    <style>
        body { font-family: system-ui, sans-serif; max-width: 520px; margin: 40px auto; padding: 0 16px; }
        h1 { text-align: center; }
        form.add { display: flex; gap: 8px; margin-bottom: 24px; }
        form.add input { flex: 1; padding: 10px; font-size: 16px; }
        button { padding: 8px 14px; cursor: pointer; }
        ul { list-style: none; padding: 0; }
        li { display: flex; align-items: center; gap: 8px; padding: 10px 0; border-bottom: 1px solid #ddd; }
        li span { flex: 1; }
        li.done span { text-decoration: line-through; color: #888; }
        form { margin: 0; }
    </style>
</head>
<body>
    <h1>To-Do List</h1>

    <form class="add" method="post" action="{% url 'task_add' %}">
        {% csrf_token %}
        <input type="text" name="title" placeholder="New task..." required>
        <button type="submit">Add</button>
    </form>

    <ul>
        {% for task in tasks %}
            <li class="{% if task.is_done %}done{% endif %}">
                <span>{{ task.title }}</span>

                <form method="post" action="{% url 'task_toggle' task.pk %}">
                    {% csrf_token %}
                    <button type="submit">{% if task.is_done %}Undo{% else %}Done{% endif %}</button>
                </form>

                <form method="post" action="{% url 'task_delete' task.pk %}">
                    {% csrf_token %}
                    <button type="submit">Delete</button>
                </form>
            </li>
        {% empty %}
            <li>No tasks yet.</li>
        {% endfor %}
    </ul>
</body>
</html>
How the template works#
A template is a normal HTML file with a few extra pieces. Django reads those pieces, replaces them with real data, and sends plain HTML to the browser. The browser never sees the Django pieces.
There are two kinds of pieces:
{{ ... }}with double curly braces means "print a value here."{% ... %}with a percent sign means "do something here," like repeat, decide, or build an address.
Everything else in the file is plain HTML. The <style> block only makes the page look nice, so you can skip it.
Repeating: {% for %} and {% endfor %}#
{% for task in tasks %}
    <li>...</li>
{% endfor %}
This is the most important piece, so let's follow where each name comes from.
In
views.py, the view reads every task from the database. Then it sends the list to the template with{"tasks": tasks}. The text"tasks"in quotes is the name the template will use.In the template,
{% for task in tasks %}takes that list and goes through it one item at a time.On each round, the loop gives the current item the name
task.
The line reads like English: "for each task in tasks, build one <li>." With three tasks in the database, you get three list items.
The name task exists only between {% for %} and {% endfor %}. Every {% for %} needs a matching {% endfor %}. Without it, Django shows a TemplateSyntaxError.
Printing a value: {{ task.title }}#
{% for task in tasks %}
    <span>{{ task.title }}</span>
{% endfor %}
The word task is a variable, and the loop above creates it. It means one single task from the list.
The dot means "get this part of it." So task.title is "the title of this task." You can also write task.is_done or task.created_at. These are the fields from your model in Step 1.
If the list holds "Buy milk" and "Call mom," the loop runs twice. The first round prints "Buy milk," and the second prints "Call mom." The browser receives <span>Buy milk</span> and then <span>Call mom</span>.
Showing a message for an empty list: {% empty %}#
{% for task in tasks %}
    <li>...</li>
{% empty %}
    <li>No tasks yet.</li>
{% endfor %}
The {% empty %} part lives inside the loop. If tasks has no items, Django skips the loop body and shows this line instead. A brand-new app shows "No tasks yet." until you add one.
Making a choice: {% if %}#
You use this twice in the template. Both uses are inside the loop, so task is available.
<li class="{% if task.is_done %}done{% endif %}">If the task is done, the result is class="done", and the CSS draws a line through the text. If it isn't done, the class stays empty.
<button type="submit">{% if task.is_done %}Undo{% else %}Done{% endif %}</button>Here we also use {% else %}. A finished task shows an "Undo" button. An unfinished task shows a "Done" button. Like the loop, every {% if %} needs a closing {% endif %}.
Building an address: {% url %}#
<form method="post" action="{% url 'task_add' %}">The action says where the form sends its data. Instead of typing /add/, we ask Django for the address labeled task_add. Django looks at tasks/urls.py and finds path("add/", ..., name="task_add"). It prints /add/.
Some addresses need a number:
<form method="post" action="{% url 'task_toggle' task.pk %}">The extra part, task.pk, is the ID of the current task. It fills the <int:pk> placeholder from Step 4. For task 3, Django prints /3/toggle/. That's why every task gets its own working button.
Protecting forms: {% csrf_token %}#
<form method="post" action="{% url 'task_add' %}">
    {% csrf_token %}
    ...
</form>
Imagine you're logged in to a site. You open a bad web page in another tab. That page contains a hidden form that sends a request to your site. Your browser sends your login with it, so the site thinks you did it. This attack is called CSRF.
Django stops it with a secret code. {% csrf_token %} puts a hidden field with that code inside your form. When the form arrives, Django checks the code. A fake form from another site doesn't have it, so Django refuses it.
The rule is simple: put {% csrf_token %} as the first line inside every form that uses method="post". If you forget it, you'll see a 403 error that says CSRF verification failed.
Why are Done and Delete forms and not links?#
In Step 3, we added @require_POST to the toggle and delete views. They only accept POST requests. A normal link sends a GET request, so it would fail with "405 Method Not Allowed."
A form with method="post" sends a POST request. That's why each button sits inside its own small form.
What the browser receives#
Say you have two tasks: "Buy milk" (done) and "Call mom" (not done). Django turns the loop into this plain HTML:
<li class="done">
    <span>Buy milk</span>
    <form method="post" action="/1/toggle/">
        <input type="hidden" name="csrfmiddlewaretoken" value="a8Xk...">
        <button type="submit">Undo</button>
    </form>
    ...
</li>
<li class="">
    <span>Call mom</span>
    <form method="post" action="/2/toggle/">
        <input type="hidden" name="csrfmiddlewaretoken" value="a8Xk...">
        <button type="submit">Done</button>
    </form>
    ...
</li>
Every {{ }} and {% %} is gone. Only plain HTML is left. You can check this yourself. Right-click the page in your browser and choose "View page source."
Quick check#
If you see
TemplateSyntaxError, look for a missing{% endfor %}or{% endif %}.If you see
NoReverseMatch, a name inside{% url '...' %}doesn't match aname=inurls.py.If you see
CSRF verification failed, one of your forms is missing{% csrf_token %}.
Run the App#
python manage.py runserverOpen http://127.0.0.1:8000. Add a task, click Done, then delete it. Your first Django app works.
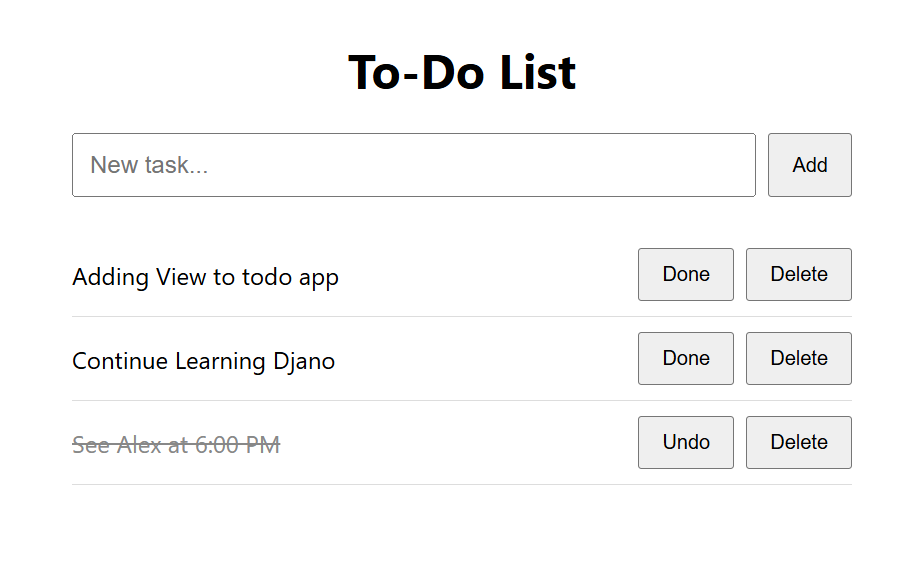
Here's the final project structure:
todo-project/
├── manage.py
├── db.sqlite3
├── config/
│   ├── settings.py
│   └── urls.py
└── tasks/
    ├── admin.py
    ├── models.py
    ├── urls.py
    ├── views.py
    ├── migrations/
    └── templates/
        └── tasks/
            └── task_list.html
Common Errors and How to Fix Them#
ErrorFixTemplateDoesNotExistCheck the template path. Make sure tasks is in INSTALLED_APPS.no such table: tasks_taskRun makemigrations and then migrate.CSRF verification failedAdd {% csrf_token %} inside the form.NoReverseMatchThe name in {% url %} must match the name in urls.py.ModuleNotFoundError: djangoActivate your virtual environment again.
Where to Go Next#
You now know the full Django flow: model, view, URL, and template. The best way to make it stick is to change this app yourself. Add one feature at a time, from easiest to hardest.
1. Add a due date to each task#
This repeats what you just learned, with one new field.
Add
due_date = models.DateField(null=True, blank=True)to theTaskmodel.Run
makemigrationsandmigrateagain.Add
"due_date"tolist_displayinadmin.py.Print
{{ task.due_date }}in the template.
The null=True, blank=True part means the field is optional. Old tasks don't have a date, so Django needs to allow empty values.
2. Add an edit page#
Right now, you can't fix a typo in a task. You'll need a new view, a new line in urls.py, and a new template. You can use get_object_or_404 like in task_toggle. This is the same pattern as Steps 3 to 5, so it's good practice.
3. Let each person have their own tasks#
Right now, everyone who opens the site sees the same list. To fix that, you add a login system. Django already includes one (django.contrib.auth), so you don't write it from scratch.
The idea is to link each task to a user. You add a user field to the Task model, then filter the list in the view so people only see their own tasks. Start with the official Django tutorial on authentication, because this step has many small parts.
4. Write a test#
A test is a small piece of code that checks your app works. For example, you can test that visiting / returns a working page. Django has testing tools built in, and you write tests in the tests.py file that is already inside your tasks folder. Tests let you change code later without fear of breaking something.
5. Build an API#
An API is a way for other programs to talk to your app. A phone app or a separate website can ask your Django app for the task list as data, instead of a web page. The popular tool for this is Django REST Framework, a package you install on top of Django. You can then connect a frontend built with Next.js, a JavaScript tool for building websites.
Good places to learn more#
The official Django documentation at docs.djangoproject.com has a tutorial that builds a polling app.
The Django REST Framework website at django-rest-framework.org has a quickstart for step 5.
Pick feature 1 today. It takes about ten minutes, and it proves you understand migrations.