Building an API sounds scary… until you build your first one and realize it’s basically:
Model → Serializer → View → URL → Test.
In this tutorial, we’ll build a tiny Notes API with Django + Django REST Framework (DRF), then test it using Postman.
What you will build:
- A
Notemodel (title + content) - API endpoints:
GET /api/notes/(list notes)POST /api/notes/(create a note)
- Test everything in Postman
0) Requirements
You need:
- Python 3.x installed
- Basic terminal commands
- (Optional) Postman installed
If Python is not installed yet, follow this complete guide first:
How to Install Python on Windows, macOS, and Linux (Step-by-Step Guide)
1) Create Project Folder + Virtual Environment
Create a folder and enter it:
mkdir notes_api
cd notes_api
Create and activate a virtual environment:
Linux / macOS
python3 -m venv venv
source venv/bin/activate
Windows (PowerShell)
python -m venv venv
venv\Scripts\activate
2) Install Django + Django REST Framework
pip install django djangorestframework
Save dependencies (recommended):
pip freeze > requirements.txt
3) Create Django Project + App
Create project:
django-admin startproject config .
Create app:
python manage.py startapp notes
Your project now looks like:
notes_api/
├── config/
│   ├── settings.py
│   ├── urls.py
│   └── ...
├── notes/
│   ├── models.py
│   ├── views.py
│   └── ...
├── manage.py
├── venv/
└── requirements.txt
4) Add Apps to settings.py
Now we need to tell Django about the apps we installed.
Step 1: Open the Project in a Code Editor
If you are using VS Code, open your project folder like this: From inside your project directory (notes_api/):
code .
If code command doesn’t work, open VS Code manually and: - Click File → Open Folder - Select your notes_api folder
You can also use any other editor:
- PyCharm
- Sublime Text
- Notepad++
- Even basic text editors (not recommended long term) What matters is that you can edit project files comfortably.
Step 2: Open settings.py
Inside VS Code, navigate to:
config/settings.py
Scroll until you find:
INSTALLED_APPS = [
Now add:
"rest_framework" "notes"
Your final INSTALLED_APPS should look like this:
INSTALLED_APPS = [
    "django.contrib.admin",
    "django.contrib.auth",
    "django.contrib.contenttypes",
    "django.contrib.sessions",
    "django.contrib.messages",
    "django.contrib.staticfiles",

    # Third-party
    "rest_framework",

    # Local apps
    "notes",
]
Save the file (Ctrl + s)
5) Create the Note Model
Now we’re going to define what a Note actually is in our system.
In Django, a model represents a table in the database.
Each field inside the model becomes a column in that table.
Open:
notes/models.py
Add the following code:
from django.db import models

class Note(models.Model):
    title = models.CharField(max_length=200)
    content = models.TextField(blank=True)
    created_at = models.DateTimeField(auto_now_add=True)

    def __str__(self):
        return self.title
Let’s quickly understand what this means:
- title → A short text field with a maximum length of 200 characters.
- content → A larger text field. blank=True means it’s optional.
- created_at → Automatically stores the date and time when the note is created.
- str → Controls how the object appears in the admin panel. Instead of showing something like Note object (1), it will display the note title.
At this point, we have defined the structure of our database table, but the table does not exist yet. The model is just a blueprint. Django now needs instructions to actually create the table in the database.
Create and Apply Migrations
Run:
python manage.py makemigrations
This command tells Django to look at your models and generate a migration file. Think of it as a construction plan describing the database changes.
Then run:
python manage.py migrate
This command applies those instructions and creates the actual table in your database. Behind the scenes, Django creates a table called something like:
notes_note
Now your database is ready to store notes.
6) Register Model in Django Admin
Django Admin is a built-in dashboard that allows you to manage your database using a web interface.
Open: notes/admin.py
from django.contrib import admin
from .models import Note

@admin.register(Note)
class NoteAdmin(admin.ModelAdmin):
    list_display = ("id", "title", "created_at")
    search_fields = ("title", "content")
Create an admin user: A superuser is a special admin account with full permissions.
python manage.py createsuperuser
Run server and check http://127.0.0.1:8000/admin/:
python manage.py runserver
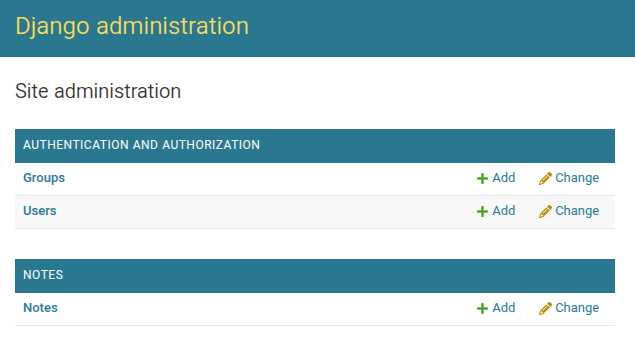
If you did everything correctly, after going to the address http://127.0.0.1:8000/admin/ and logging in with the superuser username and password, you will see something like this:
Create Your First Note from the Terminal
Before building the API, let’s create our first Note directly from the terminal.
This helps us confirm that:
- The model works correctly
- The database table was created
- Data can be saved successfully
Django provides a built-in interactive shell for this.
Run:
python manage.py shell
You are now inside Django’s interactive environment.
Import the Note model and create your first note from the shell:
from notes.models import Note
Note.objects.create(
    title="My first note",
    content="This note was created from the Django shell."
)
and press Enter.
If everything works, it will return something like:
<Note: My first note>
That means the object was successfully saved in the database.
Moving Into the API Layer
Up until now, we’ve been working with Django’s core features:
- Creating models
- Running migrations
- Managing data through the admin panel
- Creating objects from the shell
Everything so far has been about the database and backend structure.
From here on, we move into building the API layer.
This is where our project becomes accessible to the outside world.
Instead of interacting with data through the admin panel or the shell, we will:
- Convert our model into JSON
- Expose endpoints like
/api/notes/ - Accept and validate incoming requests
- Return structured responses
Now we’re turning our Django project into a real backend service.
Let’s build the API.
7) Create a Serializer (Model → JSON)
Now we need a way to convert our Django model into JSON.
APIs communicate using JSON.
But Django models are Python objects.
So we need something that translates between:
Model (Python object) ⇄ JSON (API format)
That translator is called a Serializer.
Create file: notes/serializers.py
from rest_framework import serializers
from .models import Note

class NoteSerializer(serializers.ModelSerializer):
    class Meta:
        model = Note
        fields = ["id", "title", "content", "created_at"]
        read_only_fields = ["id", "created_at"]
8) Create the API View (GET + POST)
Now we’re going to build the actual API endpoint.
So far:
- The model defines the database structure.
- The serializer translates between model objects and JSON.
Now we need something that:
- Receives HTTP requests (GET, POST)
- Uses the serializer
- Returns a proper response
That component is called a View.
In Django REST Framework, views handle the logic of what happens when someone hits an API endpoint.
What We Want
We want one endpoint that can:
GET /api/notes/→ Return a list of all notesPOST /api/notes/→ Create a new note
Instead of writing everything manually, we’ll use a powerful DRF shortcut called a generic view.
Open the File
Open:
notes/views.py
Replace its content with:
from rest_framework import generics
from .models import Note
from .serializers import NoteSerializer

class NoteListCreateAPIView(generics.ListCreateAPIView):
    queryset = Note.objects.all().order_by("-created_at")
    serializer_class = NoteSerializer
What Is ListCreateAPIView?
ListCreateAPIView is a built-in class provided by Django REST Framework that automatically gives us two main behaviors:
GET→ List all objectsPOST→ Create a new object
It already knows how to:
- Fetch data from the database
- Serialize model instances into JSON
- Validate incoming JSON data
- Save new objects to the database
We only need to tell it:
- What data to use →
queryset - What serializer to use →
serializer_class
That’s it.
No manual request parsing.
No manual JSON building.
No manual validation logic.
This is one of the reasons Django REST Framework is so powerful.
Now we just need to connect this view to a URL.
9) Add URLs for the API
Create file: notes/urls.py
from django.urls import path
from .views import NoteListCreateAPIView

urlpatterns = [
    path("notes/", NoteListCreateAPIView.as_view(), name="note-list-create"),
]
Connect it to the main project. Open: config/urls.py
from django.contrib import admin
from django.urls import path, include

urlpatterns = [
    path("admin/", admin.site.urls),
    path("api/", include("notes.urls")),
]
10) Quick Test in Browser
Run server:
python manage.py runserver
Visit: http://127.0.0.1:8000/api/notes/
11) Test in Postman
A) Test GET (List Notes)
- Method: GET
- URL:
http://127.0.0.1:8000/api/notes/ - Click Send → Expected:
200 OKand[].
B) Test POST (Create Note)
- Method: POST
- URL:
http://127.0.0.1:8000/api/notes/ - Body → raw → JSON
- Paste:
{
  "title": "My first note",
  "content": "Hello from Postman!"
}
- Click Send → Expected:
201 Created.
12) Common Beginner Errors
- ModuleNotFoundError: 'rest_framework': Run
pip install djangorestframeworkand checkINSTALLED_APPS. - 404 Not Found: Check if your URL is
/api/notes/(don't forget the trailing slash!). - no such table: Run
python manage.py migrate.
13) What’s Next?
- Add
RetrieveUpdateDestroyAPIViewfor specific notes. - Add Authentication (JWT or Token).
- Add Pagination.
No magic. Just a clean pipeline: Model → Serializer → View → URL → Postman.